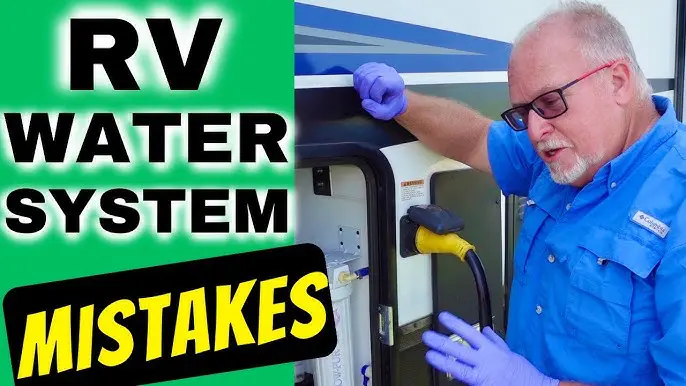
Maintaining an RV water system is crucial for a smooth trip. Regular checks keep it clean and safe.
Owning an RV gives you the freedom to explore. But it also comes with responsibilities. One key task is keeping the water system in good shape. Your RV’s water system is vital. It handles drinking water, showers, and dishwashing. Without proper maintenance, you risk having dirty water or leaks.
This can ruin your adventure. In this guide, you will learn simple steps to maintain your RV’s water system. By following these steps, you ensure clean water and avoid problems. Ready to keep your RV’s water system in top condition? Let’s dive in!
Introduction To Rv Water Systems
Maintaining an RV water system ensures clean water and prevents damage. Regularly check for leaks and sanitize the tanks. Clean filters frequently and avoid using harsh chemicals.
Owning an RV is an exciting adventure. But maintaining its water system is crucial. The RV water system provides clean water for drinking, cooking, and bathing. Keeping it in good condition ensures a comfortable and safe travel experience.Importance Of Maintenance
Proper maintenance of the RV water system prevents problems. It ensures a continuous supply of clean water. Regular checks help avoid leaks, clogs, and contamination. Neglecting maintenance can lead to costly repairs and health risks.Components Of The Water System
An RV water system consists of several key components:- Freshwater Tank: Stores clean water for use inside the RV.
- Water Pump: Transfers water from the tank to the faucets.
- Plumbing Lines: Carry water to sinks, showers, and toilets.
- Water Heater: Provides hot water for showers and washing.
- Gray Water Tank: Collects used water from sinks and showers.
- Black Water Tank: Stores waste from the toilet.
| Component | Maintenance Task |
|---|---|
| Freshwater Tank | Clean and sanitize regularly. |
| Water Pump | Check for proper function and leaks. |
| Plumbing Lines | Inspect for leaks and clogs. |
| Water Heater | Flush and check for sediment build-up. |
| Gray Water Tank | Empty and clean frequently. |
| Black Water Tank | Empty and sanitize regularly. |

Credit: www.reddit.com
Regular Inspection
Regular inspection of your RV water system is crucial. It ensures the system works properly and prevents potential issues. By checking for leaks and inspecting connections, you can catch problems early. This saves you time and money down the road.
Checking For Leaks
Inspect your RV water system for leaks. Look around water tanks, pipes, and faucets. Even small leaks can cause big problems over time. Check under sinks and around the toilet. Also, examine the area around the water heater. If you notice any damp spots, take action immediately.
Inspecting Connections
Inspect all connections in your RV water system. Ensure they are tight and secure. Loose connections can lead to water damage. Check hose clamps and fittings. Make sure they are in good condition. If you find any worn or damaged parts, replace them promptly.
Cleaning The Water Tank
Maintaining your RV’s water system is crucial. Keeping the water tank clean ensures safe water for drinking and other uses. Regular cleaning prevents bacteria and algae growth. Follow these steps to clean your RV’s water tank effectively.
Draining The Tank
First, turn off the water pump. Open all faucets and let the water flow out. This helps in draining the tank completely. Don’t forget to flush the toilet to empty any remaining water.
Locate the drain valve on your RV. Open the valve and let the water drain. Check the owner’s manual for the exact location if you’re unsure. Make sure the tank is empty before proceeding to the next step.
Sanitizing Procedures
Fill the tank halfway with clean water. Add a quarter cup of bleach for every 15 gallons of water. This solution helps kill any bacteria in the tank. Close the tank and let the water circulate through the system. Turn on the pump and open each faucet until you smell bleach.
Let the solution sit in the tank for at least 12 hours. This ensures thorough sanitization. After the waiting period, drain the tank again. Refill it with clean water and flush the system. Repeat this step until you no longer smell bleach.
Cleaning your RV water tank regularly keeps your water safe. It also prolongs the life of your water system. Follow these simple steps to enjoy clean water on your travels.
Water Filtration
Maintaining your RV water system is crucial for a safe and enjoyable trip. An essential part of this maintenance is water filtration. Clean water is vital for drinking, cooking, and showering. Let’s explore the different aspects of water filtration in your RV.
Types Of Filters
There are several types of filters available for RVs. Each type has its own benefits. Here’s a brief overview:
- Sediment Filters: These filters remove dirt and debris. They are the first line of defense.
- Carbon Filters: These filters eliminate bad tastes and odors. They also remove some chemicals.
- Reverse Osmosis Filters: These filters provide the highest level of filtration. They remove most contaminants.
- Ultraviolet (UV) Filters: These filters kill bacteria and viruses. They are excellent for ensuring safe drinking water.
Installation And Replacement
Proper installation and regular replacement of filters are key to maintaining clean water. Follow these steps to ensure your filters work efficiently:
- Identify the type of filter your RV uses.
- Consult the filter’s manual for installation instructions.
- Turn off the water supply before installing the filter.
- Install the filter according to the manual.
- Turn the water supply back on and check for leaks.
- Replace filters as recommended by the manufacturer.
Most filters have a lifespan of three to six months. Always keep spare filters on hand.
Here’s a quick reference table for filter replacement:
| Filter Type | Replacement Frequency |
|---|---|
| Sediment Filter | Every 3 months |
| Carbon Filter | Every 6 months |
| Reverse Osmosis Filter | Every 12 months |
| UV Filter | Every 12 months |
Regular maintenance of your RV’s water filters ensures clean and safe water for your travels.
Winterizing The System
Winterizing your RV water system is crucial for preventing damage. Cold weather can freeze your pipes, causing expensive repairs. Proper winterization ensures your RV is ready for the next season. Follow these steps to keep your RV water system safe during winter.
Draining Water Lines
First, turn off the water pump and disconnect the water supply. Open all faucets and let the water drain out. Don’t forget to flush the toilet to empty the lines. Next, find the low point drains and open them. This will remove any remaining water in the pipes. Close all faucets and drains once the water is out.
Using Antifreeze
Use RV antifreeze to protect your water lines. Do not use automotive antifreeze, as it is toxic. Start by pouring antifreeze into the fresh water tank. Turn on the water pump to circulate the antifreeze. Open each faucet until you see pink antifreeze coming out. Remember to run the shower and flush the toilet too. This will ensure all lines are protected. Finally, turn off the water pump and close all faucets.

Credit: www.pinterest.com
De-winterizing The System
De-winterizing your RV water system is essential before hitting the road in spring. This process ensures your system is safe and functioning properly. It involves flushing antifreeze, reconnecting water lines, and checking for leaks. Let’s break down these steps to make it easy for you.
Flushing Antifreeze
Start by draining all the antifreeze from your RV water system. Open all faucets, including hot and cold, to let the antifreeze flow out. Don’t forget the outdoor shower and low-point drains. Connect your RV to a fresh water source. Turn on the water pump and allow fresh water to run through the system.
Continue flushing until clear water flows from every faucet. This step is crucial to remove any residual antifreeze. It prevents any unpleasant taste or odor in your water. Also, remember to flush the toilet several times. This ensures all antifreeze is removed from the toilet and its components.
Reconnecting Water Lines
After flushing the antifreeze, it’s time to reconnect your water lines. Inspect all hoses and connections for any signs of wear or damage. Replace any damaged parts to avoid leaks. Reconnect the water heater bypass valve to its normal position.
Turn on the water pump and open each faucet one by one. Check for leaks at each connection point. Tighten any loose connections to ensure a secure fit. Finally, fill the water heater with fresh water and check for leaks around the heater.
By following these steps, your RV water system will be ready for your next adventure. Happy travels!
Troubleshooting Common Issues
Maintaining an RV water system is crucial for a comfortable and enjoyable trip. Troubleshooting common issues can help you avoid unexpected problems. Here are some practical tips on how to deal with frequent issues you might face.
Low Water Pressure
Low water pressure can be frustrating, especially during a shower or when washing dishes. Here are some steps to troubleshoot this issue:
- Check the Water Pump: Ensure the water pump is turned on and functioning properly. A faulty pump can cause low pressure.
- Inspect for Leaks: Look for any visible leaks in the water lines. Leaks can reduce water pressure.
- Clean the Filter: A clogged water filter can restrict water flow. Clean or replace the filter regularly.
- Examine the Pressure Regulator: Make sure the pressure regulator is set correctly. Adjust if necessary.
Unpleasant Odors
Unpleasant odors from the water system can make your RV experience less pleasant. Here’s how to address this issue:
- Sanitize the Water System: Periodically sanitize the water system to prevent bacteria and mold growth. Use a mixture of bleach and water for effective cleaning.
- Check the Water Source: Sometimes, the odor comes from the water source. Ensure you are using clean, filtered water.
- Flush the Tanks: Regularly flush the fresh water, gray water, and black water tanks. This helps remove any lingering odors.
- Replace Old Hoses: Old hoses can harbor bacteria and cause bad smells. Replace them if they are worn out.
| Issue | Solution |
|---|---|
| Low Water Pressure | Check pump, inspect leaks, clean filter, adjust regulator. |
| Unpleasant Odors | Sanitize system, check water source, flush tanks, replace hoses. |

Credit: www.amazon.com
Expert Tips And Tricks
Maintaining your RV water system is essential for a hassle-free adventure. Knowing expert tips and tricks can make all the difference. These tips help keep your water system in top shape, ensuring fresh water and a smooth journey.
Preventative Maintenance
Regularly inspect your RV’s water hoses and connections. Look for any signs of wear or leaks. Replace worn-out parts immediately to prevent bigger issues.
Flush your water system every few months. This helps remove any build-up of minerals and bacteria. Use a water system cleaner designed for RVs for best results.
Check your water pump regularly. Listen for any unusual noises. If it sounds different, it may need servicing or replacement.
Useful Tools And Products
Invest in a quality water pressure regulator. It helps protect your RV’s water system from high-pressure damage.
A water filter is essential. It ensures clean, safe water for drinking and cooking. Replace the filter as recommended by the manufacturer.
Use a water hose specifically designed for RVs. They are safe and durable, reducing the risk of contamination.
A water system cleaner is a must-have. It helps keep your system free of build-up and bacteria, ensuring a fresh water supply.
Frequently Asked Questions
How Often Should You Clean An Rv Water System?
Clean your RV water system at least every six months. Regular cleaning prevents buildup and ensures safe water.
What Products Are Best For Rv Water System Maintenance?
Use RV-specific cleaning products and water filters. These products are designed to maintain water quality and prevent damage.
How Do You Sanitize An Rv Water Tank?
Sanitize your RV water tank using a bleach solution. Fill, let it sit, and flush thoroughly.
Why Is Water Pressure Regulation Important In An Rv?
Regulating water pressure prevents damage to your RV’s plumbing. Use a pressure regulator to maintain safe levels.
Conclusion
Maintaining an RV water system is essential for a smooth journey. Regular cleaning helps avoid contamination. Check for leaks to prevent water damage. Use the right chemicals for tank maintenance. Drain and flush the system before storage. Monitor water filters and replace them when needed.
Proper care ensures safe and clean water. A well-maintained system enhances your RV experience. Follow these steps for a worry-free trip. Enjoy your adventures with confidence!